

5 Practical Life Activities for your Toddlers and Preschoolers
“Practical Life” activities are the best first experiences for young children. These little ones are very eager to move, learn, manipulate and explore the world through their senses and of course their tiny hands — and your home is the best and most natural place for them to begin their journey. By incorporating simply daily life activities into their schedules and routines, you can enable them to grow and experience life in the most entertaining way. You can in a sense “program” them to function independently, complete tasks confidently and become an active member of your household. The best part is, all the materials needed for these activities are readily available and fairly affordable. An added benefit to completing these activities is, he/she will develop muscle control, coordination, sensory exploration, independence, self-confidence, patience and perseverance.
Here are a couple of easy to assemble, fun yet challenging activities that you can do with your child ages 14 months and up.
1. Marbles and Golf tees


Materials: floral foam/ rectangular styrofoam; same number of golf tees and marbles, bowls for the marbles and the tees
a. Show your child how to push the tees into the styrofoam.
*For older children you can add an extra instruction of putting them in a row or making dots on the styrofoam and have them stick the tees on the specific dots.
* If your child is counting, you can have him count out loud specific number of tees or count each tee as he stakes them into the foam.

b. Have the child balance one marble on top of each of the tees.
* Again, have the child count as he/ she places it on top of the tee.


c. Have the child explore and repeat this activity freely.

*For Titus (15 mos), he just staked the tees down. He had a blast repeating it. (I think you can tell from the intensity in his face.)


Bonus: You can try using ping pong or golf balls for a new challenge.
Try writing the numbers on the balls and tees to make it a numerical matching activity.
*Have them practice lining them up from left to right, which is a preparation for reading! 🙂

He saw we had flat marbles too so he lined it up in front and started counting.
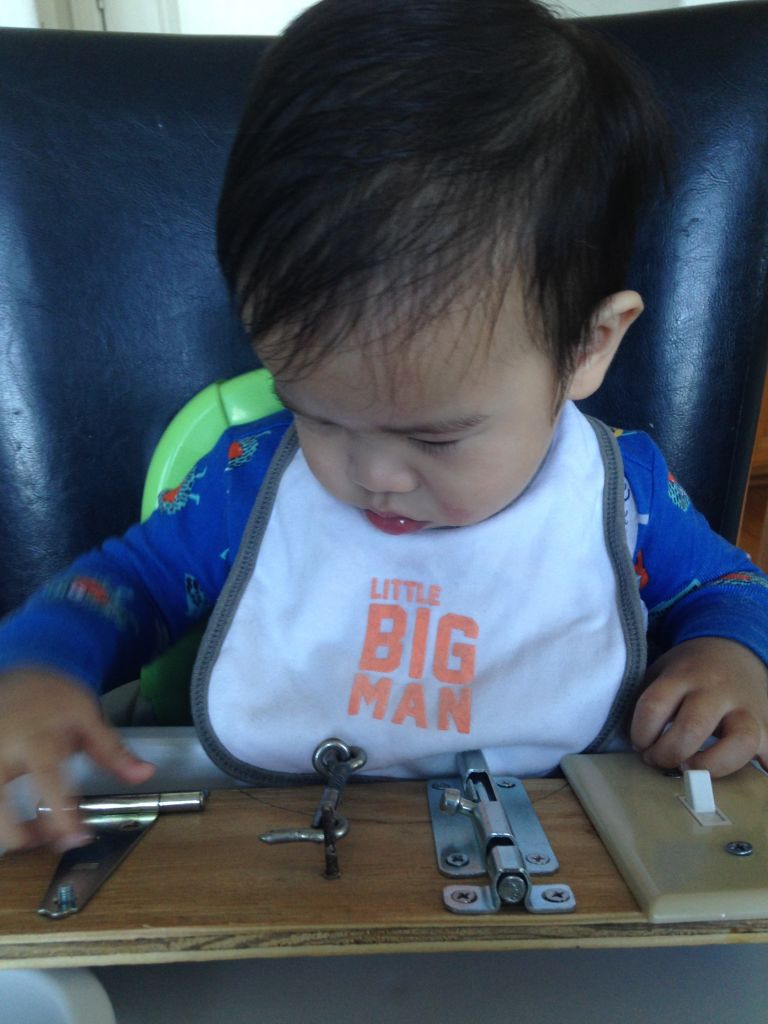
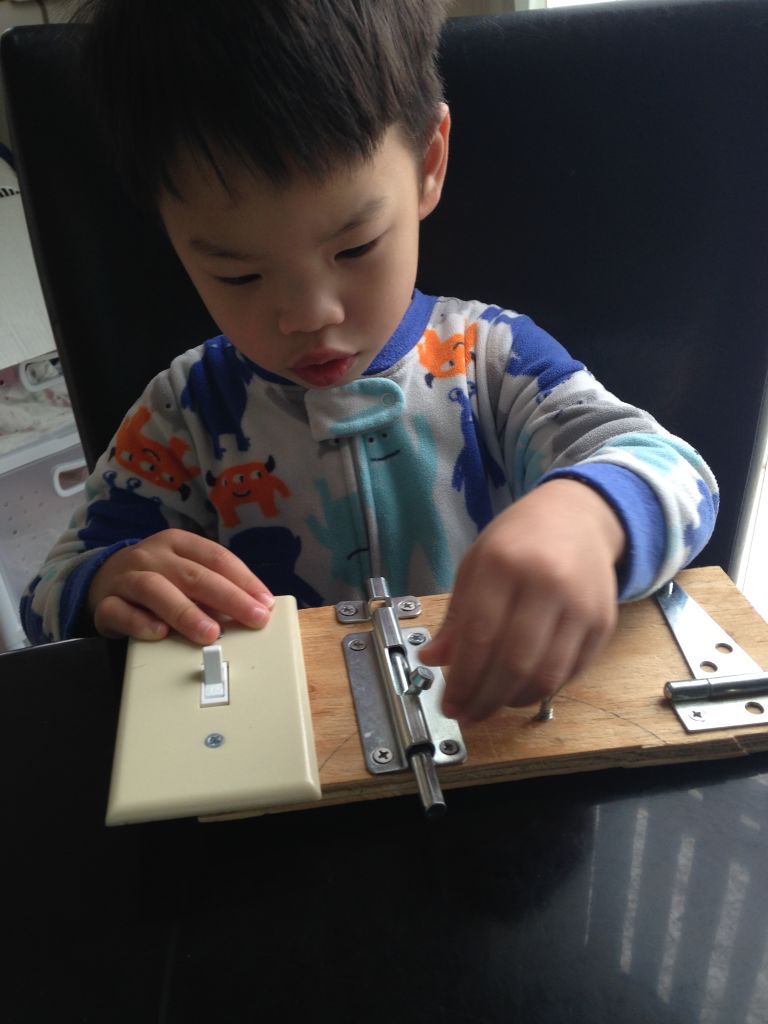
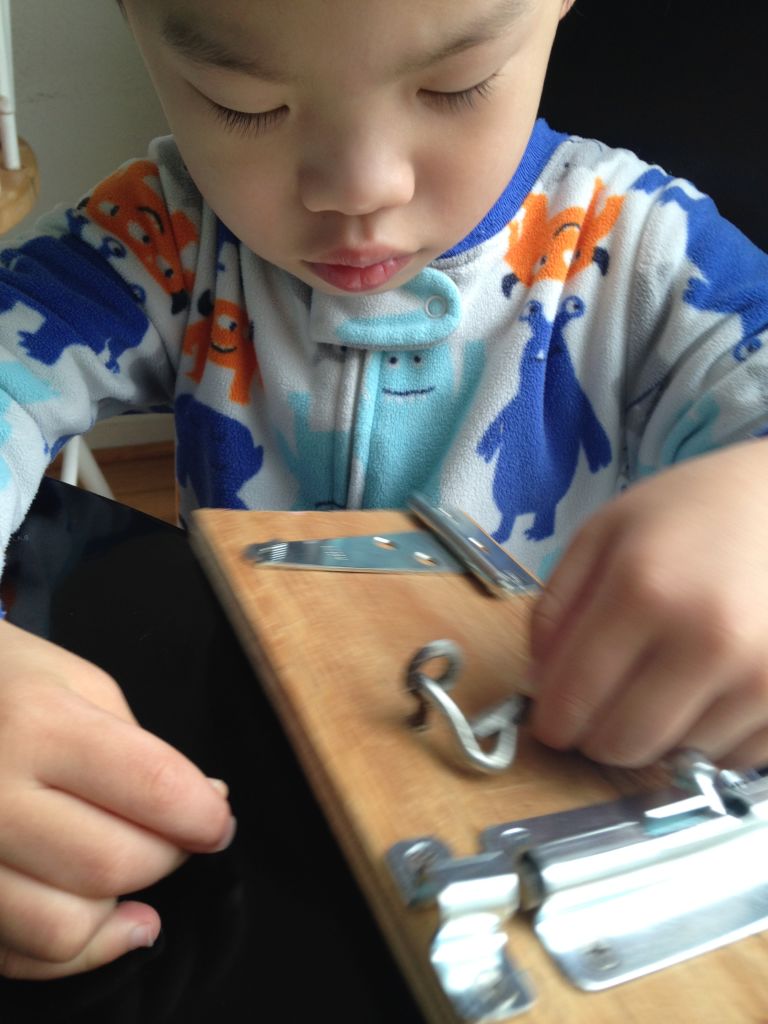
2. Busy Board
Materials: a wooden board, light switch plate, different door locks

My handy father-in-law made this for the boys. He bolted down the four “spare” items he had in his garage. He had a light switch, a sliding door lock, a hook lock and a metal hinge. This activity board never fails to entertain my boys for long periods of time. They both individually sit and work on this board for over 30 minutes each.
The first time Titus attempted this board, he repeatedly flipped the metal hinge. He used his little fingers to take the edge off and bring it back down putting the hole in the pin.


For his second attempt (on another day), he interestingly worked on the sliding door lock. I showed him how to use to turn the handle, place it in the space and slide it down. I then showed him how to “lock” it by sliding it up with the handle. But he couldn’t seem to quite get the “locking back up” part. He would successfully use the handle to “open” it (in the same way I showed him) but he decided it was easier to push the lock back up with his pointer finger from the bottom. Then turn the handle off to side to make sure he locks it. He was definitely getting those little fingers moving!


Titus is currently working on turning the light switch on and off. It is surprisingly hard for him to manipulate even if it seems like such an easy task. He is developing the muscle strength in his fingers to move the switch back and forth. He now finds this part of the board the most interesting and challenging. (Sorry I wasn’t able to get a picture.)
Micah on the other hand, since he is a bit older, got the light switch on his first try and learned to manipulate the sliding lock quickly. He used the handle to slide it up and down easily.


But, he had difficulty figuring out the other lock that made use of more complex steps. The hook lock required him to pull the bottom metal part and hold it down in order to unhook the lock. To lock it back up, he had to hold the metal part down (again), put the hook through the hole then release the metal. This seemed more complicated than he had anticipated and it was necessary for him to focus in order for him to remember all the steps. It was wonderful to see that he repeated his activity until he was successful and with much ease. He was actually excited to show and teach his brother how to do it. It took him more than a couple of tries to finally figure it out.


3. Ball Holders
Age: 12 months-18 months would love this!
Materials: Balls, muffin tin

1. Show the child how to place each ball in each cup.
2. Have your child wait until you are finished showing him/her then give him/her the turn.
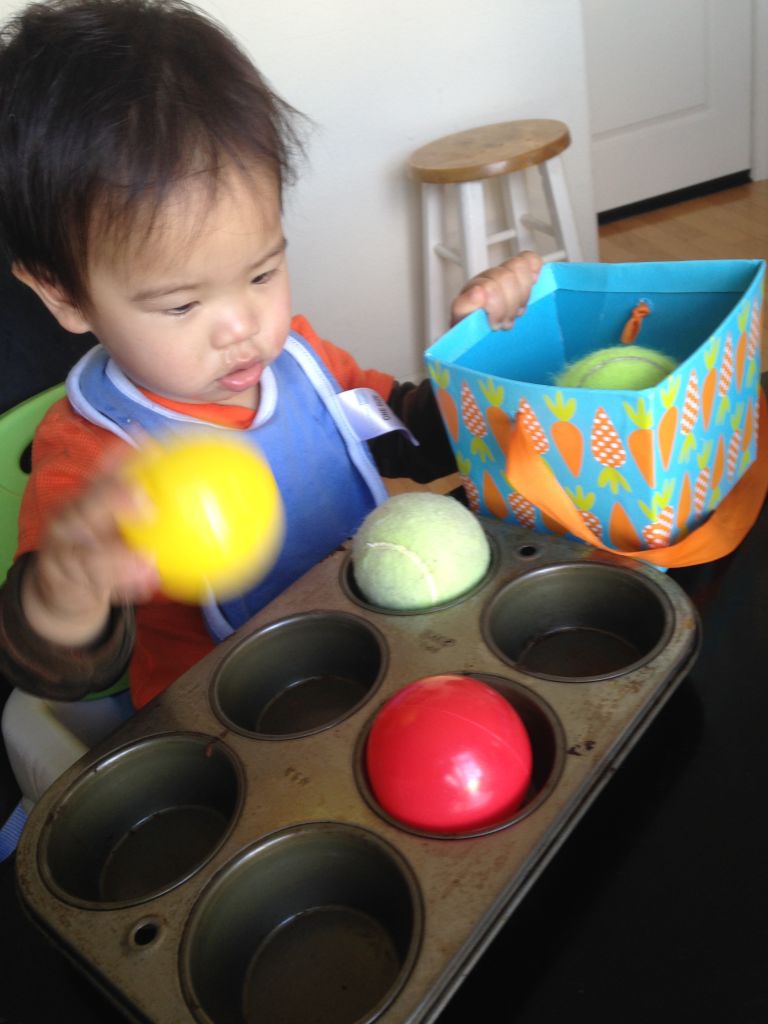

3. Make sure the child doesn’t “toss” the ball into the cup but gently places it into the cup.
* This allows your little one to practice muscle control and hand movement. He/she will be practicing and strengthening those fingers and opening and closing his/her hands. This also teaches him/her one to one correspondence and hand-eye coordination. This encourages dexterity-development in muscles, impulse control (especially the need to throw the ball or maybe even chew it) and instruction following. Titus also enjoyed switching the balls from one hole to another. It’s a great way to practice the “cross-over” motor skill that is very good for his/her arm movement. Make sure you remind your child to put all the balls away after he/she is done.


4. Object Transfers
Materials: bowls, cups, water, spoon, tweezers, tongs, rice, beans, etc
Transferring involves moving materials back and forth between different containers. (Start with two especially when you are first introducing this activity.) Start by using larger objects that are easier for your little one to grasp. As his/her muscles get stronger, introduce smaller materials. As your child gets more and more comfortable, start using a spoon, a sponge, tweezers, tongs and water! With plenty of practice, your child will be able transfer and pour different objects with ease. This activity may sound really boring but to a toddler, it is exciting!
A. Balls and Boxes: 2 identical boxes; a number of balls (depending on how many can fit in your box)
a. Show your child how to transfer the balls one at a time from one box to another.
b. Complete the task and have your child repeat it.
*Make sure you remind your child to transfer all the boxes before repeating the activity again. This teaches them to complete a task before doing it again. It is important to emphasize doing it one at a time to help them resist the temptation of dumping all the balls at once. As we looked inside the boxes, I would use words like “full,” “empty” and “more.”
*Titus would (of course) occasionally put the empty box over his head and laugh out loud. He has since repeated this activity over and over every day.


B. Bowls and Marbles: 2 identical bowls; marbles
a. Show your child how to transfer the marbles one at a time from the full bowl to the empty one.
b. Show him/her how place the marble gently into the bowl and prevent it from making the clanging sound.


c. Your child might be tempted to dump all the marbles into the other bowl right away and love the sound that it makes but allow him/her to exercise self-control.
* Make sure you go from left to right which is an indirect preparation for reading. The use of their fingers will refine their hand grasp that will eventually execute a proper writing grasp.
Clearly, Micah thought this would be fun for him too. 🙂 He totally went for it right after he finished his work.

* You can progress to using tweezers to pick up the marbles to increase the difficulty.
5. Food preparation: Celery Cutting (age:3)
Materials: a small knife, apron, chopping board, pre-washed celery stalks, bowl
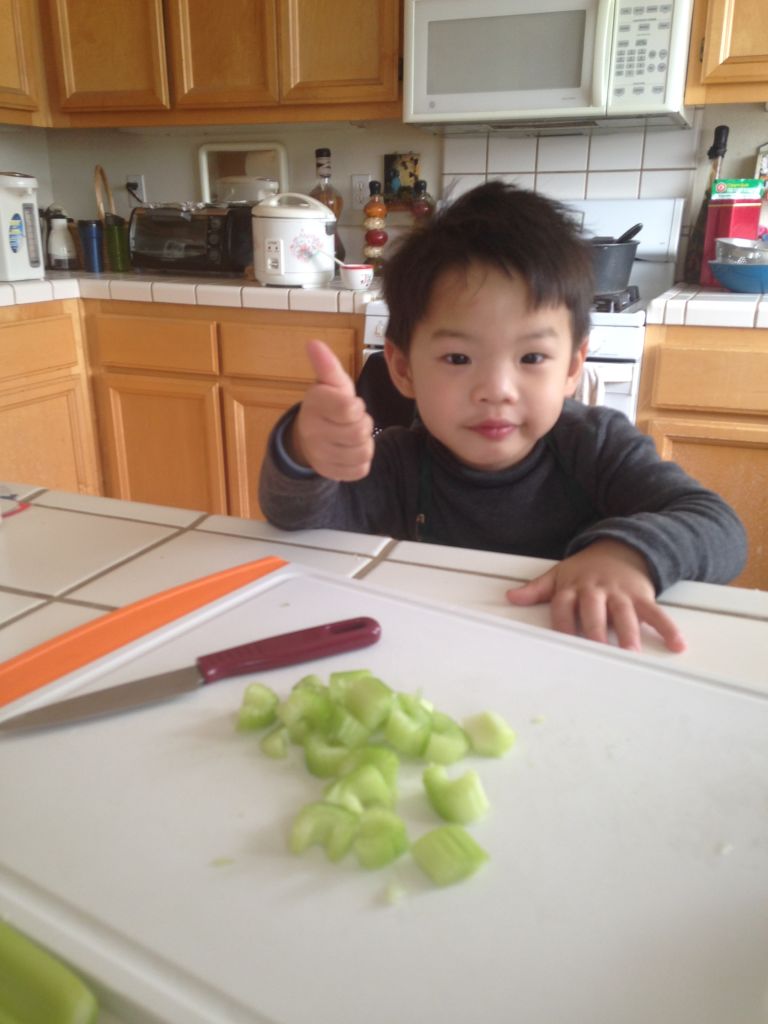
1. Introduce the different items that will be used: knife, apron, board and food.
2. Show your child how to properly and safely use a knife.
3. Demonstrate how to slice the celery into small pieces. Holding the celery down with one hand and slicing with the other. Put the knife down and transfer the sliced pieces to the bowl.
4. Have your child take another stalk and repeat.
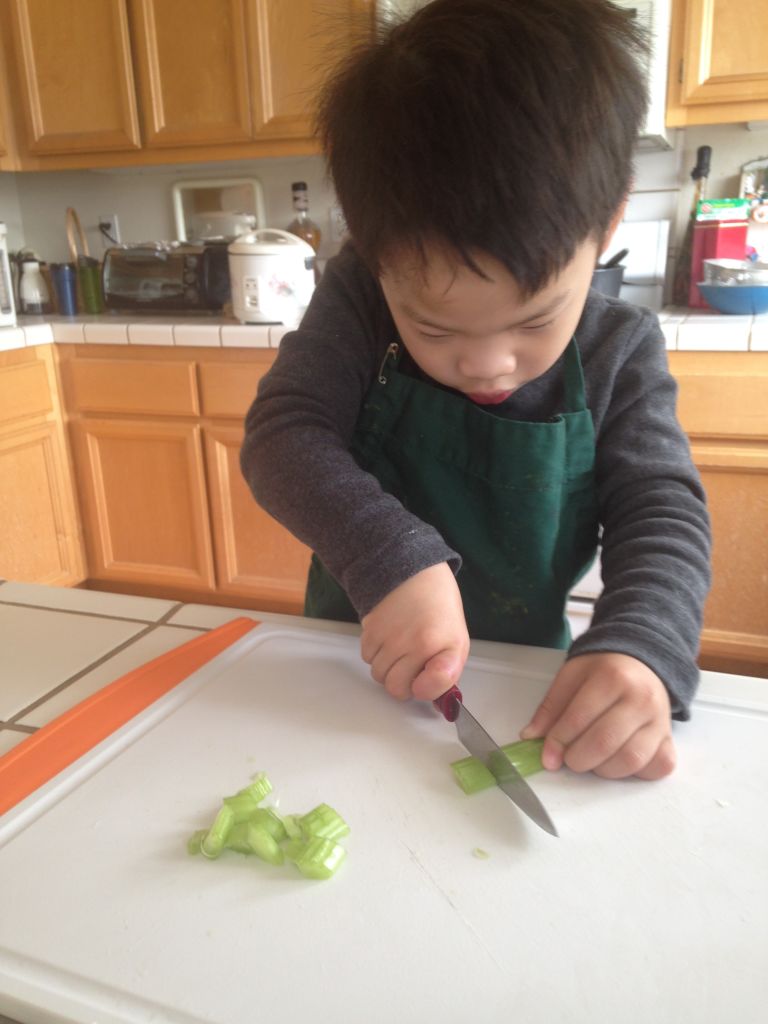


5. Monitor the activity closely and remind your child to stop slicing at least 2 inches from the end. You can slice the last piece if needed.

6. Have the child place all the sliced pieces into the bowl.
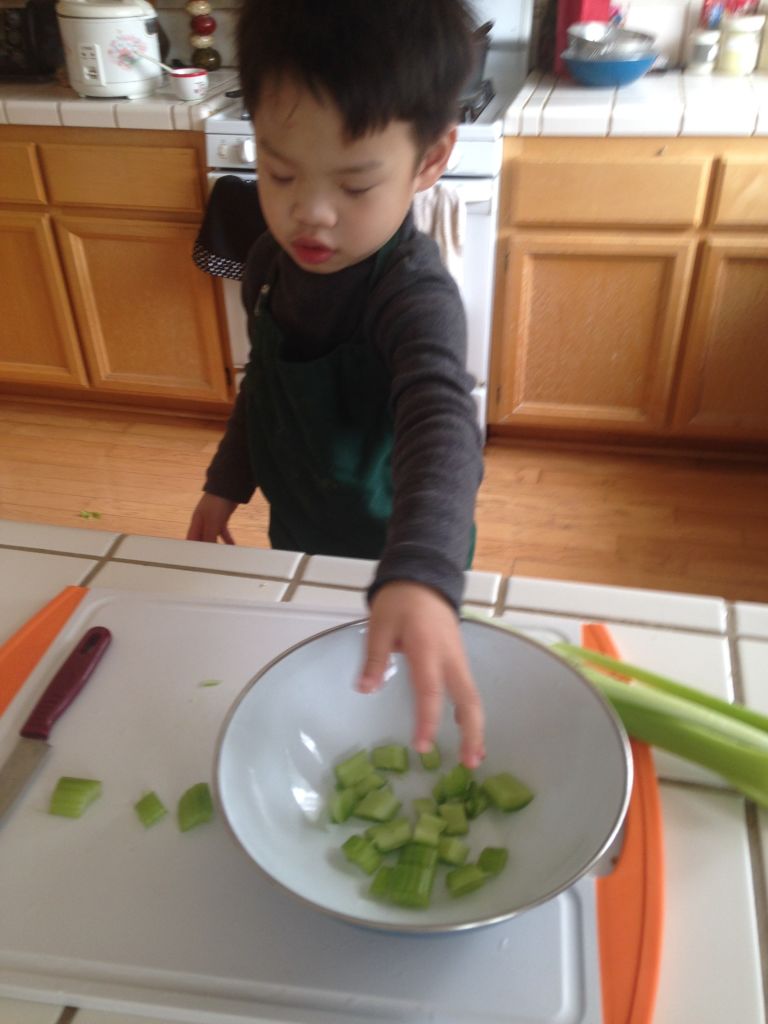
7. Take another stalk and repeat the process until all are sliced.

Micah was stoked when he got a chance to slice these celeries. He left the last two stalks for me because he said I should try slicing because it was fun. I was glad he had a good experience because he will certainly be my kitchen helper in the near future. He felt extremely proud of his achievement and shared his contribution with the family while we were enjoying our meal.


Micah: all the cut celery in the bowl Mommy: all the cut celery on the cutting board
These five activities are simple, budget friendly and easily accessible for everyone. They not only keep your child occupied for long periods of time (which I love!), they also encourage him/her to stay focused, work independently and be challenged. These activities will help them in school but also in life! Way to start early!
This is a topic which is near to my heart… Many thanks! Where are your contact details though?
hi! great! I’m so glad you like it 🙂 you can email me at thehippomum@gmail.com 🙂